Tips To Follow When Switching To LED Electrical Lighting

The Ultimate Beginner’s Guide to Energy Saving Light Bulbs

I bought my first LED light bulbs. They were to replace halogens in my bathroom. I spent too much money on not enough lumens and way too many kelvin. You know what I mean? No? Perfect. Let’s make a deal. If you spend ten minutes reading this post, I promise you that by the end of it you’ll understand how to buy a low energy light bulb. In return, I’ll try not to bore you senseless.

What fitting do you need?

This is simple, but you really don’t want to mess it up. Although there are literally hundreds of light fittings in existence, your home probably only has a couple. I’ve got two in my ceiling fittings, a couple more in table lamps.

You don’t need to know what they mean. But if you scribble down the fittings before you start shopping for bulbs, not only will they fit, they’ll be the right voltage too

What shape bulb do you want?

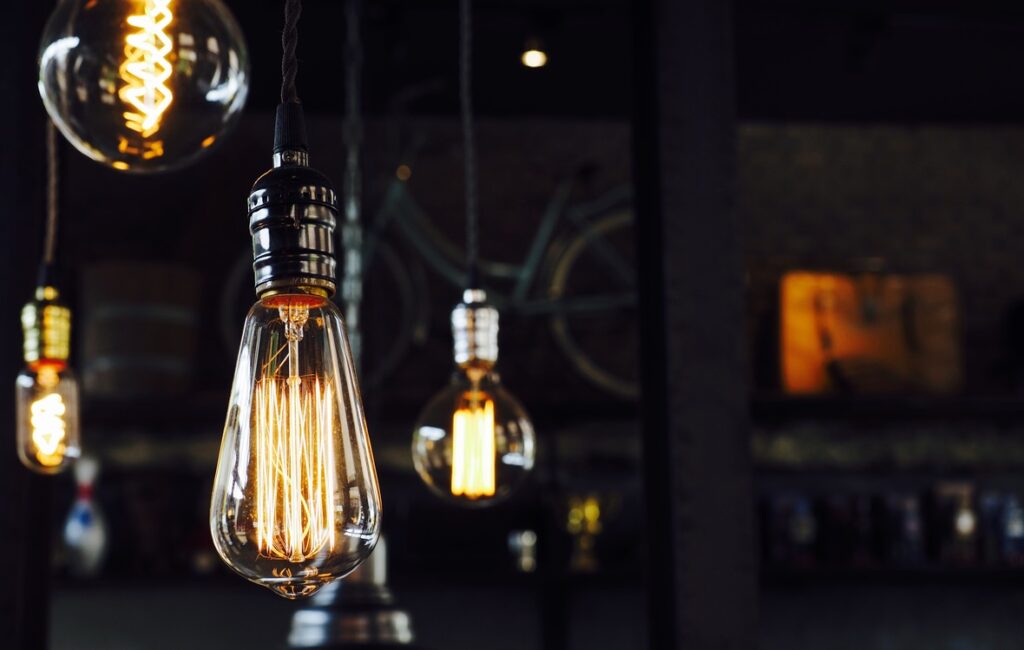
Bulb shape is not just a question of liking the look of a bulb: it is about how it throws light. The design of the bulb determines what direction the light goes, so you need to consider what you want the bulb to do.

There’s an encyclopedia of different bulb shapes, but since I promised not to bore you, I’m not going to go there. All you need to do for shape is use your common sense. For a ceiling pendant you might want an ‘omnidirectional’ bulb like the arbitrary, stick or spiral shape. For a lamp, you might need a candle shape with a broad spread. And if you are putting a spot into a recessed downlight, you’ll need a reflector with an appropriate beam width for the context.

How to Install Low-Profile LED Lights in Your Kitchen

Tools Required

Drill

Drywall circle cutter or manual drywall saw

flexible drill bit

wire cutter

wire stripper

I’ve tackled several kitchen projects over the years, but I’ve never made such a major improvement with so little time and money. I spent less than $350 and just four hours brightening our kitchen. My original intent was strictly practical: I just wanted better light to make food prep and cleanup easier. But replacing the single fixture with bright LEDs transformed the room, surprising me and amazing our guests.

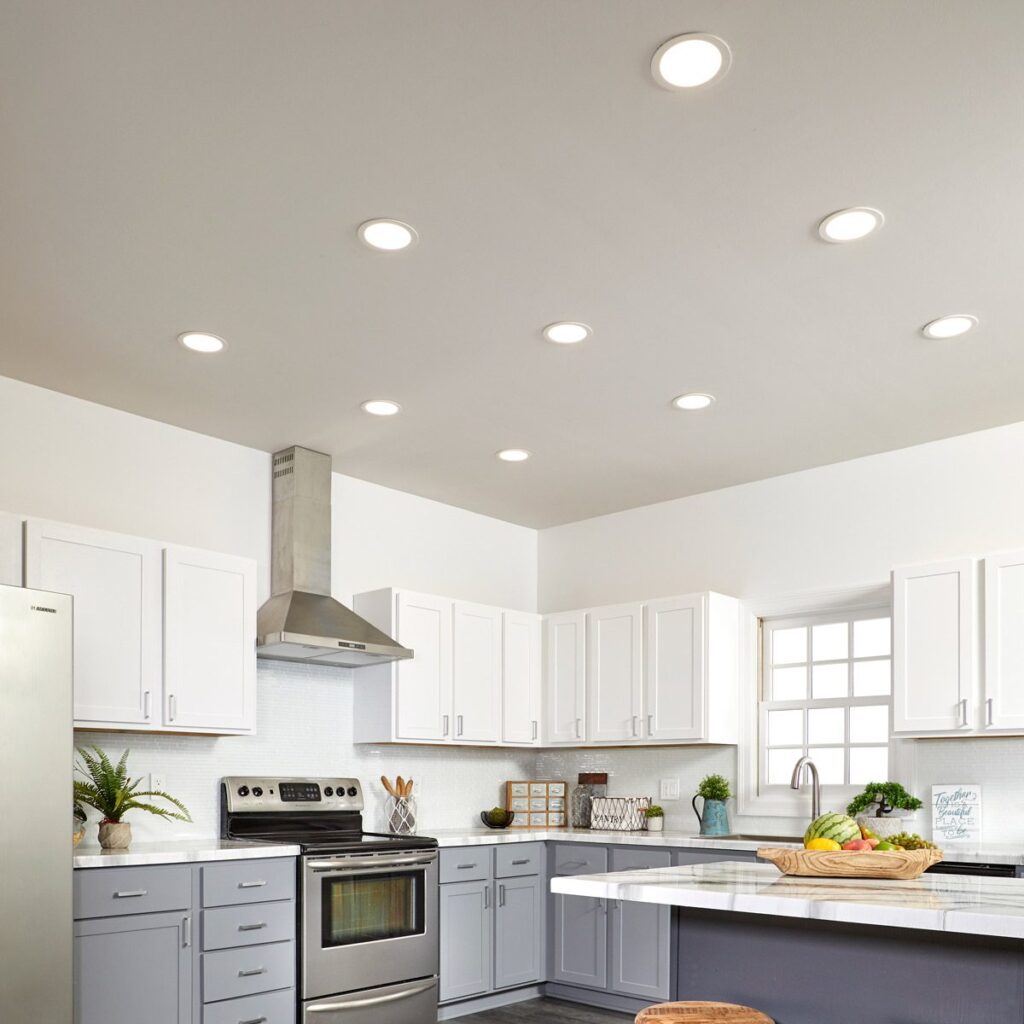
LOW-PROFILE LEDs MADE IT EASY

Initially, I thought I’d install recessed can lights for a sleek look and lots of light. Then, I ran across these ultra-slim Halo LEDs ($30 each). These LED lights are super bright (900 lumens) and have such a low profile (less than 1/2 in.) that you can even locate them directly under a joist if needed. They’re rated for insulation contact and wet locations, so you can use them in a shower or even outdoors. A switch on the side of the box lets you adjust the color temperature. They’re also dimmable.

All you need is a power supply, a means to cut round holes, 14-2 NM-B cable, basic electrical tools and a drill. The transformer box converts 120V to low voltage, and it’s UL-listed as a junction box with room for power in and power out. That lets you take power from the first box and string together as many lights as you want. You might need to fish wire, but aside from that, installation is easy. Several companies make a similar product, but this was in stock at the local home center.

PLANNING THE JOB

If you have an attic above, you can access the joists from there instead of working from below as I did. That simplifies fishing wires, but you’ll still have to dig through insulation. Before starting the job, remove the ceiling fixture and look inside the junction box. My box had just one incoming cable. If your box contains more cables, wiring will be a bit more complicated. You may need to install a second junction box because the box for these LED fixtures can house only two 14-2 cables. I replaced the existing fixture with an LED like all the others.

Mark all the joists involved in the installation using strips of tape. Then mark the location for each new light with tape. The lights can go anywhere, but I kept them close to the joists to get better access for attaching the transformer boxes to the joists.

LED Fixture Installation Guide

Tools You’ll Need

Tape measure

Wire stripper

Scissors

Screw driver

Before You Begin

We know how boring it can be to read instructions, so we’ll keep this installation guide as short and sweet as possible. Before you begin with your installation, be sure to fully read these instructions. They contain many useful tips and pointers that will help to ensure a perfect installation, save you time, and ensure your safety.

It is important that this product (and all other electrical products) are installed by a qualified person in accordance with the National Electric Code (NEC) and all applicable local building and electrical codes for your area. If you are unfamiliar with the NEC, your local building/electrical codes, and/or the proper installation methods for electrical devices, you should hire a qualified and licensed electrician to do the work for you.

If you have at least 1.75” of space above your drywall, you will usually choose the conventional installation method. If you have a pipe, wire, joist or other obstacle in your way, you may be able to use the conventional installation method, if you have enough room to get a junction box through your hole. If you have less than 1.75” of space above your drywall, you’ll typically use the low clearance installation method.

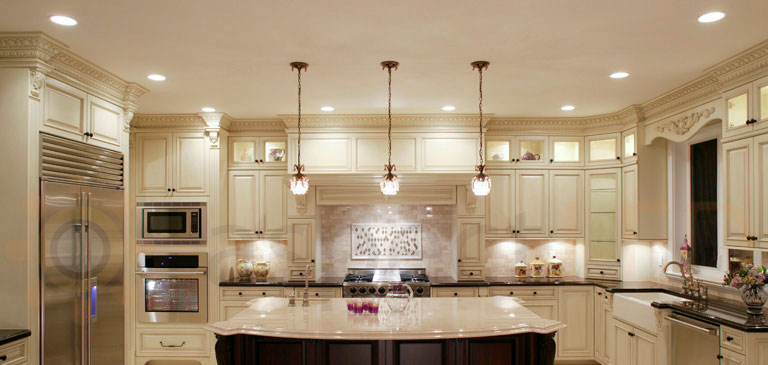
Planning your layout

Most electricians space recessed lights equally apart from each other forming a grid pattern on the ceiling. The distance between each light generally depends on the LED wattage of your light. Here are a few rough rules of thumb for spacing when using the lights as primary lighting (if you are using the lights as accent lighting or you have other lights in your room, you can space them further apart)

New Construction Rough-In Plate/Bracket

These rough-in brackets make installing ultra-thin recessed LED lights in new construction applications a breeze. Simply install the rough-in plates at your designated locations before installing drywall, have your drywallers cut/router the holes for your lights using the rough-in plate as a guide, and then snap your ultra-thin light into place after drywalling is completed

Light bulb buying guide

Simple steps to light bulb success

Standing in front of rows of light bulbs can seem overwhelming, and choosing the right one can be hit and miss if you don’t have the right information. So, whether you’re working out if it’s a BC or ES fitting or trying to compare watts with lumens, we can help you choose the right bulb and brighten up your home in no time.

Either check the symbol on the packaging of your existing bulb if you have it or look at the base of the bulb. This illustration on the left is an example of what you’ll see on B&Q light bulb packaging to help you identify your cap fitting.

Know your bulb shapes

There are a few things to consider when choosing your bulb shape. Does the bulb need to be exactly the same shape as your old bulb? Some bulb replacements will be like-for-like, so if you’re changing a spotlight, you will need a spotlight shaped bulb.

Replacing old bulbs

If you’re replacing an old-style energy saving CFL spiral or stick shaped bulb, you can change these to a newer LED bulb. These new bulbs not only look better but they are more energy efficient too. Incandescent bulbs have largely been removed from the market, but don’t worry if you need to replace one of those; you just need to find an equivalent option from the bulb technologies below.

LED bulbs:

LED stands for Light-Emitting Diodes. LED bulbs cost less to run, produce less heat and last much longer than the older style bulbs. Don’t be put off by the initial cost of LED bulbs, these bright lights will save you more in the long run due to their low energy consumption. Dimmable LED bulbs are available.

The Complete Guide to LED Christmas Lights

Before you put your Christmas lights up this festive season, there’s a few essential things you need to remember. With so many lights on the market at this time of year, it’s important to compare your options and find out which type of lighting works best for you. Whether it’s incandescent lighting or LEDs, we compare them both and find out how LEDs can save you money.

Installing your Christmas lights won’t be a scary thought anymore as we look at both inside and outside lighting ideas, and the best way to install them. Have you ever wondered how many lights you need to get that extra sparkle on your Christmas tree or where’s best to buy LED lights? Then follow our complete guide to Christmas lights to find out more!

Buying Christmas lights

If you have older, traditional incandescent filament lighting and have kept them over the years, maybe for sentimental reasons, it’s best to make sure that your traditional filament bulbs meet the most recent and highest safety standards.

If your lights do not carry either of these safety marks, it could be that your lights have not undergone the rigorous testing and are not safe to use. Poor safety standards mean they carry a greater risk of fire and have been made with cheap electrical components.

With the high fire risk of filament bulbs, LEDs have become the popular choice for Christmas lighting. They don’t get as hot, have less chance of catching fire and they work at a lower voltage than traditional bulbs. As LEDs are diodes instead of incandescent bulbs, they are less likely to break, which means they’re more likely to withstand a variety of cold and damp British weather.

Selecting Cheap Outdoor Electrical Lighting For Fun And Function

Outdoor Lighting

Transform the exterior spaces of your home with outdoor lighting that creates a welcoming ambience as well as adds a sense of security to your home.

When planning your outdoor lighting, think about how you want to use your outdoor space and identify all the areas you’d like to illuminate. Do you entertain a lot and need to light up your pool, BBQ and alfresco dining area? Or perhaps, you’d like to showcase your landscape design and highlight sculptures, trees, fountains, or an architectural feature in your garden. Or are you just after essentials for security lighting?

Whatever you decide, you have plenty of outdoor light fittings to choose from – wall sconces, hanging lights, strip lighting, deck lights, downlights, spike spots, bollards, step lights and much more. Just make sure that they’re rated for weather exposure and if you live in a particularly wet environment like the coast, consider marine-grade stainless steel finishes that can tolerate heavy moisture and salt sprays.

Outdoor Lights

Outdoor lights are some of the best items you can buy for the outside of your home and the reasons for that are numerous. This type of lighting manages to beautifully combine practicality with visual appeal, meaning that any outside lights you choose are guaranteed to not only be functional but also look amazing

Solar powered exterior lighting buying guide

When it comes to outdoor lights, based customers love solar power. Unlike interior illumination, which doesn’t get enough exposure to the sun, outside lighting can immediately benefit from this extraordinary renewable source of energy. Thus, you can easily save money with outdoor solar lights whilst never having to worry about hiding away annoying cables or connecting your lights to a power outlet. What’s more, solar outdoor lights look contemporary and chic. Thanks to functioning independently from any outside power sources, the design options are limitless. With a little help from the syb, posts and bollards are so much easier to spread around the garden – some solar powered garden lights can even be stuck in the ground – and decking lights can be placed independently from each other, since no connection cables are needed. What you might not already know is that they are in fact battery operated outdoor lights. That’s because batteries are vital in order to actually store the sun energy accumulated throughout the day. This will have some further implications that you’ll need to bear in mind, such as having to change the batteries once in a while. Thus, if at some point your solar outside lights stop performing well, you might need to have a look at the batteries and replace them. Another fun fact about these lights is that they type of bulb they usually have is LED. The reason is quite simple: LEDs are incredibly energy-efficient, meaning that they only require a small amount of electricity to function. That, of course, makes solar outdoor lighting way more efficient.

Different categories of outdoor lights

If you have a close look at this page you’ll notice that we have carefully selected some featured categories to display on the left. They represent more refined classifications within the broad category of outdoor lighting, as well as being some of the most popular and searched for types of exterior lighting, such as outdoor wall lights or LED outdoor lighting

Value value

We know that when you shop for your home it’s not just design and functionality that you’re after, but also good value for your money.With this in mind we’ve prepared some carefully budgeted lists of your favourite products in terms of outside lights. If you look above and on the left, you’ll be able to see a section called Everyday Values, containing a few of the best products we offer at great prices. Speaking of budgets, if you need a limit when you’re shopping for outdoor lights, be it a minimum or a maximum, we have price filters on every results page.

Get inspired and seek advice

be a great resource when it comes to simply getting some inspiration. Whether you’re ready to shop for some outside lights or not, ideas are free and we offer plenty of those too. That’s why we’re always updating our Inspiration pages with fresh content every day on a variety of topics, including outdoor lighting. You can also find some of our most useful articles and guides listed under Ideas & Advice right here, on the left side above. Whether you need tips on how to choose the perfect exterior lighting for your home or you’re planning a party and want to quickly see some recommendations in terms of garden lights, we can light the way!

Outdoor and Motion Lighting

Home Electrical Repair

Electricity is arguably the most valuable resource we have in our modern society. Without electricity, most of the things we do and rely on on a daily basis wouldn’t be there. So while electricity is so ingrained into our lives that we can take it for granted and hardly notice it’s there, if there’s an electrical problem, it can be difficult to notice anything else.

electrical repair technicians know what a hassle any electrical problems can be, which is why we’ll always respond to any requests for service as quickly as possible. And because all of our technicians are licensed, background checked, and professionally trained

Always Hire a Professional Electrical Repair Technician

No matter urgent any electrical repairs seem, it’s never okay to attempt to handle them on your own. Trying to take care of electrical problems without professional training is extremely dangerous. If you or someone else aren’t hurt during your attempt, there’s still a chance that you’ve left something undone that poses a huge risk to you, your home, or your family

Electrical Troubleshooting

Circuit breakers that keep tripping, a flickering light on the back porch, or an exhaust fan that just won’t work properly—all of these are common problems homeowners face that have something to do with their electrical systems. But figuring out where the problems is stemming from can take a lot of work

What’s the Best Way to Run Power Outside?

Short-Term Power Supply (AKA: Extension Cords)

For those in need of power outdoors for a short time, such as to trim your bushes, power a bounce house for your kid’s birthday, or provide lighting for a party, an extension cord will get the job done for a day or two. Be certain to only use extension cords marked for outdoor use, which are designed to withstand moisture, temperature changes, the sun, and a bit of foot traffic. Never use indoor extension cords outside, they are not built for such rugged use. Do NOT leave even your outdoor extension cord outside more than a day or two. Left outside over extended periods, cord materials can breakdown, potentially resulting in sparking, fire, and shock. Always follow outdoor electrical precautions.

Essential Outdoor Extension Cord Safety

Pick the right cord for the job. Cords are NOT one-size-fits-all. Choose a cord rated to handle the wattage of all connected devices. The larger the wire, the more current it can safely handle.

Always plug outdoor extension cords into a GFCI outlet. These can be identified by TEST/RESET buttons, and are typically found in the kitchen, bath and garage. These devices protect your family from shock in the event the cord is exposed to water.

To ensure safety and prevent tripping hazards, be sure to select a cord that is the correct length, neither too short nor too long.

Always unplug your cord, storing it properly indoors when not in-use.

Safely Installing Long-Term Power Solutions

For lighting, lawn tools used on the regular, or outbuilding power needs, you need a permanent power solution for safety, whether that involve an outdoor outlet addition to your home’s main structure, or wiring run remotely to an outbuilding. For lines not off the house, cable must be wired to a separate GFCI indoors. It must also be buried quite deep (18” below patios/paths; 30” below lawns) and encased in PVC conduit that has been solvent-welded to ensure a continuous run (no leaks), a solution that is not DIY-friendly for most and requires an electrician

Installing a GFCI Outlet Outside

When running power outside, a GFCI-equipped outlet ensures safety, and is required by code in all areas exposed to moisture, like the outdoors. When adding an outdoor outlet, be sure to choose an outdoor-rated, weatherproof model with built-in, high-sensitivity GFCI. Whether single or duplex, all exterior outlets should have spring-loaded covers to protect them from weather, pests, dirt, and most importantly moisture. GFCI protection is a smart addition, and inexpensively and easily added in moisture-prone areas where electrocution is a higher risk.

Placing the Outlet

When adding an outdoor outlet, look for a conveniently located indoor outlet to connect to with the wiring. Drill a hole through the house wall and feed the wiring in close to the indoor outlet. Fit the mounting box for the outdoor outlet over that hole. Draw in the wiring and connect it to the outlet terminals, then put the faceplate on the box, ensuring all waterproof seals are correctly positioned. Run the wiring indoors to its connection point, adding a separate GFCI if none exists.

Garden Lighting Ideas to Illuminate Your Outdoor Space

Solar Garden Lighting

Want to light up your garden or other outdoor area without using more electricity? Solar garden lighting can help. Solar lighting is available in quite a few different styles, from stake lights that stand alone to illuminated stepping stones. There are even solar string lights available from some manufacturers.

They all use solar collectors to absorb sunlight during the daylight hours. That energy is stored in an internal battery, which kicks in when the ambient light drops below a certain level, or you turn them on.

LED Garden Lighting

LEDs offer lower power consumption than incandescent bulbs, and substantially higher light emission. However, because individual LEDs are very small, you need quite a few of them to equal the amount of light emitted from conventional lights. With that being said, there are many different styles of outdoor lighting that use LEDs.

They’re an ideal option for pairing with solar technology due to their low power consumption, which can add hours of use time. These lights also last far longer than conventional incandescent or halogen bulbs, allowing you to get the most out of your investment. LED garden lighting can be found in many formats, as well, ranging from string lights and rope lights to spot lights and stake lights.

Plug and Play Garden Lighting

Long to add a bit of light and colour to your garden or deck, but don’t want to go through the hassle of hiring an electrician to wire it all up for you? Plug and play garden lighting is the answer.