Popular Wedding DJs Services And How You Can Get Them

Hidden Qualities All Successful DJs Share

Yeah, mixing is important. Sure, a great music collection helps. Yes, you have to produce music to get further than a certain level. And definitely, a level of technical knowledge will get you through many sticky situations. Truth is though, there are too many DJs who have this stuff for it to be a guarantee of success – and there always were!

I’ve booked and played alongside scores of successful DJs through the years, and I’ve noticed that there are certain qualities they share that, quite aside from their music, gear and skills, had helped to move them apart from the pack. I slowly noted these qualities, and followed them in my own DJing life too, and now I want to share them with you. so why not share which of these qualities you think you need to improve on, too?

Passion

Not only do you love music, but you have an intense passion for DJing, and it shows: You basically eat, breathe, and even sleep it!

…and, “I love music, isn’t that enough?” – isn’t enough! What exactly is it you’re passionate about? What is it you’re trying to share in your DJing? My good friend (and great DJ) Dave Haslam once told me: “DJing is about the exchange of emotion between the DJ and his or her crowd…” and I think he’s right. What is it you’re trying to say through your music? Where is your passion?

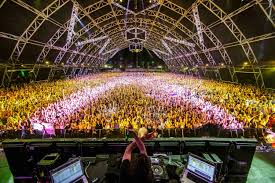
This will almost always be passion for a scene, and in my experience, it’s normally (at least initially) the scene that got you into the whole thing in the first place (drum & bass, trance, EDM, dubstep, deep house, etc.) It’s the one you go all glassy eyed about when talking about what prompted you to get started in DJing. It’s the one that’s the soundtrack of your dreams of what it must be like to play the perfect DJ set, to the perfect crowd…

Basically, if you love a certain local scene more than anything and anyone else, you’ll get noticed in that scene, and you’ll get openings. So it’s important you locate where your passion is and start your journey there. (This is why giving mixtapes out alone won’t get you booked – where’s the passion there? DJs who truly love a scene will come up with something far more original that that, and go many, many extra miles, to their “in”…)

Confident

Another characteristic of a competent DJ is that they are always confident of what they are doing. This is due to the realization that for one to bring the best out of themselves, they must execute confidence all the time. When an individual is confident of the qualities that they have, a lot of people will be attracted to them. This is an aspect, which will not only boost their career, but will also bring in more work.

Unique

female dj performingAnother outstanding trait that should be clearly seen in a competent disc jockey is that they must have created an identity for themselves, which enable them to stand out from the rest.

They should, in the first place, be aware of it before they create it. To know that one is competent, they should be able to bring up new things and should come up with unique skills that show they are serious about what they are doing.

Empathy

When you try to feel what your client feels, a connection is built. Telling your own personal story or a third-party story that relates to your client shows empathy. Validating their feelings and concerns gains trust. And again, trust closes sales.

Knowledge

Knowledge opens the door to confidence. The more you’re postured as a thought leader, the more respect you earn. That increases you and your company’s worth and creates sales not just on price or quality, but because of your value.

Owning Your Strengths

What makes you different from the other DJs competing for gigs? If you know what your strengths are, how are you using them to your advantage? If you have an old school sound that has been updated, use it, promote it and own it.

Owning your strengths doesn’t mean you’re being arrogant. As a business owner you need to know what makes your business (pro DJ) stand out from the crowd.

If you don’t know, ask your DJ friends and loyal fans. They are most likely to tell you the truth…even if it hurts!

Open To Others

When you are confident in your skills and where your career as a DJ is going you are more likely to be open to others and willing to help. You don’t want to constantly guard yourself, your set list and your hidden tricks because you’re afraid some bright young thing is going to steal your spot.

This will help bring people who are just as passionate as you are into your personal and professional orbit. You want people around you who love what they do because it will benefit you all. This will make your work life more rewarding but it will also allow you to surround yourself with a like-minded support system.

Do you possess all of these qualities yet? If not, get to work. Your life as a pro DJ awaits!

How To Care For Hardwood Flooring And Maintain Them

Hardwood Floors: A Complete Guide

Whether you’re laying a wood floor in a new house or replacing one that’s damaged beyond repair, there are dozens of species to pick from, including trusty domestics, such as oak and maple, and intriguing exotics, such as tamarind and acacia. You also have a choice of widths—be it rustic wide planks or traditional narrow strips—and stain colors, which allows you to tailor your floors to your house’s style and decor.

And thanks to modern adhesives, a wide variety of species are available as “engineered” boards. Made from a stable sandwich of veneers, rather than solid stock, engineered floors can go places where it wasn’t practical to install wood before: over radiant-floor heating systems and concrete and in basements.

How much do hardwood floors cost?

Costs are between $1.50 to $8 per square foot depending on wood thickness, species, and grade. Some prefinished solid-wood and engineered wood floors are DIY-friendly, but if you plan to hire a pro installer, tack on $2 per square foot, minimum.

How many years do they last?

Some prefinished solid-wood boards come with a 50-year warranty. With regular care, though, any solid-wood floor can easily last twice that long. Warranties on the finish for engineered wood range from 10 to 30 years.

How do you maintain them?

Fight a finish’s biggest enemy—abrasive dirt—by vacuuming regularly and laying runners and doormats near entries.

Tips for Installing Solid Hardwood Flooring

Advice for Installing Solid Hardwood Flooring

Updating a home’s flooring is one of the best ways to increase its value. Even though design trends are always changing, you can never go wrong with a solid hardwood floor.  Fortunately, installing solid hardwood flooring isn’t a difficult job as long as you have the right tools, knowledge and patience.

I want to give you seven tips for installing solid hardwood flooring I’ve learned over the years so you can complete a quick and professional hardwood installation.  An important note on solid hardwoods: make sure you leave the wood inside the home with the boxes open for at least a few weeks prior to installing solid hardwood flooring.  It’s important that the wood acclimatizes to the environment to prevent cupping or shrinkage after installing the hardwood flooring.  I used an inexpensive moisture meter to test the moisture content of my hardwood to ensure it was within 1% of the rating of my subfloor.

Removing the Baseboard

The baseboard should be removed before installing solid hardwood flooring.  Some might recommend undercutting the base, but it’s a time intensive exercise and you lose height on your baseboard.  Installing new hardwood flooring is a good time to consider replacing or upgrading your baseboard as part of the project.  Score the top edge of a base with a utility knife to make sure you remove the old base cleanly.  Then use a small trim pry bar to pull the baseboard away from the wall.  Set the baseboard to the site if you plan on using it again, or discard it if you’re replacing it after the installing the solid hardwood floor

Preparing the Subfloor

You might not think so, but preparing the subfloor can take as much or more time than the actually installing solid hardwood flooring – it all depends on the current floor material.  If you’re replacing carpet, simply pull up the carpet at one of the corners with a pair of pliers and remove the underlayment and tack strips.  I’d recommend saving some of the carpet if it’s also used in other areas of your house.  It’s often impossible to find matching carpet after a few years, plus the carpet you’re removing will already have a similar wear pattern to what’s used elsewhere in your home.

You should cut the subfloor in small squares to score the vinyl and underlayment. The underlayment is usually attached with staples and adhesive so you need to wear eye and hearing protection.  It’s also best to use a dull blade because a new blade will definitely be dull once you’re finished.  After the surface is scored you have to chip the surface.  You can use a simple hammer and pry bar if the underlayment is poorly installing, but if the previous contractor used lots of adhesive and staples you need more powerful tools.  I prefer to use a rotary or demolition hammer in chipping mode with a chipping blade or chisel.  My Bosch worked well for this job.

tips for Installing Wood Flooring

Choose your wooden floor carefully

There are many different types of hardwood flooring so make sure you choose the correct one for you.  Hardwood flooring comes in a variety of different grain patterns, species of wood, plank sizes and surface finishes.  All of these will be important to you as you will want the floor to fit in perfectly with your space.  It is important that you also think about whether you want solid hardwood or engineered hardwood. Depending on how you want to lay the floor may make this decision for you. If you have underfloor heating or want to float your floor over an underlay then you will need to select an engineered hardwood.  Sometimes the subfloor will also determine the type or thickness of the flooring.  For example, if you have joists, you wooden flooring must be at least 18mm thick.  Why not have a look at Fitting wood flooring onto different subfloors for further information.

Acclimatise your wood floor

As soon as your hardwood flooring has been delivered to your property, it is important to let it acclimatise sufficiently.  Acclimatising means to allow the flooring to adapt to its new surroundings. Hardwood is a natural product and will inevitably expand and contract with changes in heat and humidity.  By letting you hardwood flooring acclimatising to your home, you are reducing the risk of damage to the wood once installed

Here are some simple steps to follow to make sure you acclimatise your floor properly:

Make sure your floor is delivered in plenty of time before the installation starts.

Put the hardwood flooring, still in its packaging, in the room where it is going to be installed.

The room should be thoroughly dry. The hardwood should not be left on a damp floor or in an area with wet plaster on the walls.

Make sure you do not leave the wooden flooring directly next to a heater or radiator.

Leave solid wood flooring to acclimatise for at least 7 days.

Leave engineered wood flooring to acclimatise for at least 72 hours.

Prepare your subfloor ready for installation

It is really important that you properly prepare your subfloor before installation.  If it has not been done correctly, it can cause your flooring to become damaged.  The most important things to check are whether your subfloor is flat, level, clean and dry.

Use a spirit level to ensure that your subfloor is flat and level. If it is not then you will need to either line your subfloor with plywood (for a wooden subfloor), or use a self-levelling compound (for a concrete subfloor).

Check the Moisture Content (MC) of your subfloor using a Moisture Meter. A wooden subfloor should be 16%MC or below.  A concrete subfloor should be below 6%MC.  If your subfloor is not dry enough you should allow it more time to dry out naturally.

Your subfloor needs to be clean. Remove any old chemicals or adhesives that may still stuck to the subfloor and then sweep away dust and dirt

Simple Steps to Keep Your Hardwood Floors Looking Good!

I have been a disobedient daughter. 🙁   My parents moved into a new house several weeks ago, and my Mom asked me for advice about how to clean and care for her new wood floors. Apparently she has been getting conflicting advice on how best to clean them. Well, while I don’t have personal experience with cleaning wood floors, I have spent a good amount of time now researching it and have been surprised to find out it’s actually VERY SIMPLE. So this is for you Mom….better late than never? 🙂

Take your shoes off!

When you walk on a wooden floor with dirty shoes, you are leaving lots of sand and dirt behind. These abrasive particles can ruin your wood floors. Position mats both outside and inside exterior doors to lessen tracked-in dirt. In snowy or rainy weather, include a boot removal area to avoid damage from water and de-icers.

Vacuum or dust mop dirt and grime away before you wash

Rubbing dirt into your floors is never a good idea. Dust the floor with a mop that has been treated with a dusting agent (or use a microfiber duster) to pick up dust, dirt, and pet hair.

For occasional deep cleaning (dirt, oil and grime will build up over time), the best solution for cleaning wood floors is one cup of vinegar mixed with one gallon of water. Immerse a clean mop into the solution and wring it until it is damp-dry. Mop the floor in the direction of the floorboards, so if the water dries with a bit of a streak in it, it will not be as visible.  After mopping, use a soft, clean towel to dry it or let it air dry.

If you want to get a little creative….steep 1 bag of tea in 2 cups of boiling water and leave until it comes to room temperature. Remove tea bag and soak cloth in liquid, wring out then wipe floor clean. Dry with a soft cloth. The tannic acid in the tea will help bring wood to a shine.

Ultimate Guide to Hardwood Flooring

As you may know, there almost always are pros and cons to taking on a do-it-yourself (DIY) project. The positive side of a DIY effort is usually the cost. For home improvement projects, labor is often the single largest expense.

Installing a hardwood floor yourself would eliminate this cost. Besides cost, there are other factors to consider:

Can you get a professional look on your own?

How much time will it take to install hardwood floors?

How much money will you save if you do it yourself?

There have been huge advancements in the construction of hardwood floors. These technological advances have made many types of hardwood floors easier to install. In fact, most hardwood floor suppliers can work with customers to find out just how much work they really want to do on their own. For instance, you can order wood floors that are pre-finished — so there is no need to finish or seal the floor before or after installation. In fact, factory-finished floors can be installed straight out of the box. Because of these types of advancements, it is easier than ever to install a hardwood floor yourself.

Obviously, hiring a professional to install your floors will take a lot less time than doing it on your own. And, you’re pretty much guaranteed excellent results. The professionals do it every day, after all. Remember, the real benefit will not be in regard to time saved or execution, but the money you could save.

If you consider that hiring a professional to install your floors could cost upward of several thousand dollars, doing it yourself may be worth the extra time. When installing your own floors, you only have to pay the cost of materials and tools or tool rental. Because you’re not paying for the quality and craftsmanship of specialized labor, these costs are considerably less than what you would pay for professional installation. All in all, if you think you’re up to the task, handy, and fancy yourself a wannabe Bob Vila or Vern Yip, this project is for you.

The Importance Of veterinarian

Unique Gifts for Veterinarians You Can Buy

If you are an animal parent, you doubtless agree that your veterinarian is indispensable! In that case, you might want to make their lives sparkle by getting them thoughtful veterinarian gifts!

Whether the animal doctor in your life is celebrating a special occasion or just saved your pet’s life, a little gift could go a long way.

Best Gift Ideas For Veterinarians:

Depending on how well you know them and the kind of relationship you have, there is something here for everyone! Take a look and discover some of the most unique Vet gifts for the veterinarians in your life.

Heart & Stethoscope Funny Fill Line Veterinarian Wine Glass

After a long, hard day of saving lives, a vet needs to kick back and unwind. How about getting them on the right track with one of these innovative wine glasses?

Veterinarian Candle

Make your vet’s day everyday with this thoughtful scented candle. The message on the jar is enough to draw on any veterinarian’s heartstrings.

Things to Bring to Your Veterinary Appointment

Going to the veterinarian for a wellness exam every year (or more often for older pets) is the best way to keep your pet healthy through vaccines and preventive medication. We have compiled a list of the ten most common things you should bring to your vet visit. Often getting everyone in the car and to the vet office is a task in itself

Bring all veterinary medical records. Even if you have don’t have detailed copies, we can call your former office to request your pet’s complete record.  This gives us the best biography of your pet’s health.

Bring your current identification, such as a driver’s license. Current identification is needed for a variety of reasons.

Bring any medications you are giving to your pet. These include flea medication, vitamins, and supplements. Our staff can evaluate the medications, check dosing and expiration dates, and refill anything you need while you are here.

Please bring a stool sample to your appointment. Stool samples are needed for annual or biannual parasite testing. Stool samples that are collected within 24 hours are acceptable. For multi-cat households, a sampling from the litter boxes is acceptable.

If your pet has an appointment for a urinary issue, then it is essential for us to have a urine sample to test. We offer free urine collection kits- just stop in to get one! Otherwise, a clean plastic container with a tight-fitting lid is perfect. Simply slide the container into your dog’s urine stream and keep in fridge until your appointment. However, keep in mind after four hours urine can become contaminated. Therefore, a urine sample should be collected just before your appointment or brought right in after collection for testing. We also have urine collection kits for cats. Cats typically won’t urinate in a tray, so our feline kits have a non-absorbent litter. Simply clean out your litter box,  replace your clay litter with ours, and collect in the morning.

Write down or take pictures of the food and treats you are feeding. Nutrition and pet weight is just one of many areas we will offer guidance.

If your pet is having a medical issue that is difficult to explain then try capturing it on video! Many symptoms, such as limping, can be difficult to observe while in the veterinary office.

Bring your pet’s favorite food and/or treats to your veterinary appointment. Coming to vet can be stressful, even for outgoing dogs. We even recommending withholding food for dogs or cats before appointments so that we can feed and help them relax. However, pets with medical issues like diabetes or geriatric pets should not so that we can feed and help them relax. However, pets with medical issues like diabetes or geriatric pets should not be fasted!

Please arrive 5-10 minutes early. We will review any changes to your contact information. Also, please b e aware that our section of 44th street is quite busy after 4 PM.

Lastly, bring a list of questions to ask your veterinarian. It’s easy to forget all the things you wanted to discuss when you’re here in the exam room.

IMPORTANT THINGS TO LOOK FOR IN A VETERINARIAN

I’m looking for a vet for my new pet. What should I be looking for?

Congratulations on your new family member.  Choosing a vet for your pet is a big decision to make. You need to look for a clinic that not only meets your pet’s needs but caters for your needs too.  Most people choose their nearest vet and whilst location is an important consideration, driving a few extra kilometers may be worth it to get the best care for your pet.

Facilities, veterinary expertise and the services offered do vary between clinics. For example, some clinics may have extensive diagnostic equipment which can result in faster diagnosis and treatment for your pet. Some clinics may be available 24/7, whilst others may be open for just a short time.

Are the clinic’s opening hours compatible with your schedule?

The clinic opening hours need to meet your needs. Do they open evenings and weekends? Do they charge extra for this service? Are house calls available?

What after hour emergency vet care do they offer?

Finding a veterinary clinic that provides emergency services is important as accidents do happen. Using a veterinarian that provides after hour care means that they have immediate access to your pet’s medical records which can lead to faster diagnosis and treatment in an emergency.

How do the veterinarians and staff treat you and your pet?

We all want calm, stress-free vet visits so making sure your pet is happy with the vet you choose is extremely important. It’s a good idea to visit the vet with your pet for a weight check and observe how the staff interact with the animals in their care. Are they approachable? Did they greet my pet? Did they seem knowledgeable and caring? Was my pet relaxed and calm?

Tips to Make Vet Visits Less Stressful for Your Cat

Anyone who has had the “pleasure” of taking a cat for a vet visit knows that it’s no picnic. It usually begins with a wrestling match to get the cat into a carrier. If you manage to survive with only a few scratches, consider yourself lucky. Then comes the “drive of doom,” where he will demonstrate his well-developed hissing and howling talents, followed by an excruciatingly long wait in the clinic’s lobby, where your cat will either retreat into the fetal position in the corner of his carrier or pace wildly within it, meowing at you in what sounds a lot like the feline version of profanity.

It’s no wonder that a recent survey revealed that two-thirds of cat parents take their pets to the vet less then once a year, in part because of “feline resistance” to the experience. It seems that cats have declared war on veterinary care. Unfortunately, it’s a war they’re winning handily.

One of the best things you can do for your cat is give him regular head-to-tail check-ups at home. Even if you don’t know what you’re looking for, simply getting him used to being handled will help enormously at the vet. What’s more, those home check-ups mean you’re more likely to notice a problem with your cat should one arise.

Another very important stress reducer is getting your pet is accustomed to being in a carrier. If he only gets into the carrier to see the vet, chances are he’ll resist it. Instead, create a link between the carrier and fond feelings by incorporating the carrier into your daily lives. Let your cat use it as a nap space and offer treats when he’s inside. You could also try occasionally leaving it open on the living room floor, incorporating it into playtime with your favorite feline friend.

Going to the vet is inevitably going to create some stress and anxiety in your cat. You can reduce this by offering plenty of love and affection before the trip. It may help calm you too; studies suggest that petting and playing with pets can reduce stress levels in humans. This is a great ritual for the hour before your vet visit. You and your pet are both going to need to be as chill as possible before getting into the car, which felines would probably call the “purring tank of terror,” if they were actually able to speak

The Life of a Veterinarian

What is it like being a veterinarian? Life as a veterinarian is rewarding, but challenging and demanding, is the answer from most vets. To be a vet, you must have a passion for or a clinical interest in animals, have great interpersonal skills, and possess a strong work ethic.

Advantages

You’ll be working with your passion

It is rewarding and fulfilling to diagnose, treat, and make animals feel better

Disadvantages

Animals will likely protest being taken to the vet’s office. You might get bitten, scratched, or kicked

Neglectful, difficult, or emotional human caretakers

Most people are inspired to go into the veterinary sciences because of their love for animals. In our interviews with pre-vet and veterinary students, a passion for animals or a childhood pet provided the spark in pursuing a career as a vet.

veterinarian and owner of Town Country Veterinary Services, shares a recent rewarding experience with a patient: ”Dolly is a 13 year old Dalmatian that we treated in January and February this year. She was so sick with an intestinal virus and got so weak that she couldn’t even stand. I was sure she would not survive. I worked very hard to save her and it all seemed for naught, but she finally slowly began to come around. This summer, I saw I saw her back to her normal active, happy self, and that was very rewarding.”

Post Construction Cleaning Business Cards

Easy House Cleaning Tips for Mesa Homeowners

Have you found that your house cleaning routine simply isn’t cutting it? If you’re surrounded by piles of clutter, an unorganized bedroom, or smelly odors, you may want to think about revamping the way you clean your home in Mesa. At Maid Right®of Greater Phoenix, our team of Cleaning Pros helps families and homeowners throughout the Mesa area maintain a clean and tidy living environment. Thanks to our extensive experience, we have some helpful tips for making your house cleaning routine less of a burden.

EXPERTS’ EASY HOUSE CLEANING TIPS

If you’re hesitant about taking a new approach to house cleaning in Mesa, just start small. Here are a few easy tips that can aid in keeping your Mesa home cleaner

Make laundry a daily chore. Rather than waiting for the weekend to get several loads of laundry done at once, throw a small load of clothes in the washer every single day. When they’re dry, fold them and put them away before bed. Doing so will prevent piles of clothes from accumulating around your home and will help you maintain an organized living environment. Plus, by using this house cleaning strategy, your favorite clothes will always be clean and ready to wear in the morning.

Institute a clutter-free zone. Make your Mesa home a clutter-free zone by designating a small catch-all bin where you can put items that need to be dealt with at a later time. Every evening, be sure to empty out the catch-all bin, placing objects back where they belong. This easy house cleaning practice can help keep the rest of your home free of clutter and prevents you from losing important items in random places around the house

quick and cheap solution for odor management. Are you dealing with unwanted odor problems at your home in Mesa? Try using baking soda to neutralize bothersome smells. For example, you can place a box of baking soda in the refrigerator and your linen closet to keep these parts of your house smelling fresh. Baking soda can also be used to freshen up smelly soft surfaces, like couches or pet beds. Simply sprinkle the powder on and wait for about fifteen minutes before vacuuming it up.

POST CONSTRUCTION CLEANING

Are you a general contractor and need a post construction cleaner? Or maybe you are a homeowner and had a recent home renovation done by your contractor and now have dust in your house from all the work being done and need a post construction cleaning. Dust and air pollutants get everywhere and a post construction cleaning is a very detailed process. You have to clean above the cabinets, inside the drawers, underneath the cabinets, underneath furniture, switch plates and every square inch where the work was done. Hopefully your contractor used containment to control the spread of dust. If not, adjacent rooms could be affected and also need to be cleaned.

Post Construction Cleanup Checklist

Clean walls (includes dust, dirt, scuffs, smudges)

Dust ceilings and ceiling fans

Clean trim, baseboards, window frames, and door frames

Dust handrails, mantels, and other various woodwork

Clean sides and tops of doors

Remove any paint, mud, and debris from hinges

Clean interior masonry (brick, rock, marble, etc.)

Vacuum carpet (taking care around the edges)

Clean floors

Clean windows (glass, tracks, frames, etc.) and remove any stickers

Clean light fixtures and bulbs

Clean electrical switches and outlets

Remove floor vents so that you can vacuum ducts

Clean inside closets, inside cabinets, and on top of shelves

Remove drawers and clean underneath

Clean blinds/shutters

Remove and dispose of all trash

Remove and dispose of any protective plastic film

Clean doors

Vacuum and dust entryway

Sweep and clean porch

Clean threshold

Clean exterior lights and remove any stickers

Vacuum, dust, and clean shelving and drawers

Scrub countertops, edges, and back splashes

Clean excess caulking, adhesives, and debris from sinks/faucets

Clean appliances inside and out

Remove all packaging, plastic, labels, etc. and throw away

Clean cabinets inside and out

Clean mirrors and glass

Post Construction Cleaning Services

First Clean Technical Services includes:

Sub Floor Cleaning

Above Floor Cleaning

High Level Infrastructure Cleaning

Machine and Plant Rooms Cleaning

External Infrastructure Cleaning Services

professional service team will help you start the process of changing a construction site to a completed project. Our experienced Management and trained technicians know that a controlled environment facility must be maintained before expensive operational equipment is installed.

Services can help you reach critical project deadlines, ensure your facility is serviced to the highest standard required for operations and exceed your client’s expectations. Our attention to detail and proven track record helps your data facility achieve a successful completion whilst achieving ISO14644 standard.

Services management and technicians have the skills, tools, and latest equipment to provide the premium service you expect from an Industry Leader.

Services are uniformed and security cleared. Without exception they all undergo extensive and specific technical training. We have procedures in place to ensure that all employees comply with current OH&S and Work safe legislation.

Post Construction Cleaning Service Checklist

cleaning services to the commercial businesses and residential homes of Illinois, Iowa, and Missouri. Being fully licensed and insured to deliver superior quality of professional services, our specialists go above and beyond. American Hometown Cleaning upholds high moral standards and work ethics, reinforces friendly customer service, and executes maximum capabilities on all services rendered on consistent basis. In conjunction with American Hometown Cleaning crew members having advanced training and years of experience, we utilize high-end products exclusively sold to licensed professionals to assure our customers receive premium results.

Need for Post Construction Cleaning

Commercial and residential customers can take advantage of American Hometown Cleaning post construction services; whether you endured a renovation, remodel, or add-on, or you are a construction business buttoning up your commercial and residential properties, our experienced experts can clean the post construction site quickly and efficiently.

Post Construction Clean Up Checklist

American Hometown Cleaning servicing commercial and residential construction post cleanup service can include,

but is not limited to the following examples of what we represent:

– Wiping all surfaces; walls, ceilings, bathroom fixtures, light fixtures, doors, door knobs, door frames, baseboards, countertops, cabinets, drawers, appliances, and so on.

– Drawers, cabinets, pantries, storage closets, and other related storing areas are cleaned inside, removing any debris for practical use.

– If needed, wooden cabinetry can be polished.

– High volume dust removal from ceiling pipes, duct work, vents, light fixtures, heaters, air conditioners, and more.

– Floors are properly swept, dust mopped, mopped, treated (buffed, waxed) and vacuumed accordingly to remove debris and spots.

– Cleaning of the insides of desks and file cabinets if applicable.

– Full sanitizing of kitchens; removing labels and sticky residue, ensuring all dust and debris is cleared and ready for use.

– Cleaning bathrooms, removing the settled debris and dust from surfaces, bathtubs, showers, and toilets are cleaned.

– Polish mirrors and stainless steel fixtures.

– Wipe down ceiling fans.

– Cleaning window tracks, sills and window frames.

– Window and glass cleaning including scraping and etching removal.

– If applicable, fireplaces are cleaned and ready for use.

– Garages are cleared of dirt, debris, and trash.

Cleaning knows that post construction cleanup is important. If any specifics need to be addressed, we are more than happy to accommodate. Continuing to perform all duties with diligence and attention to detail is part of what we do when we perform a post construction cleanup on your residential or commercial property in Iowa, Missouri, and Illinois. With the use of our eco-friendly, but highly effective cleaners, surfaces receive the ultimate level clean

How To Clean a New Construction Home

The housing market continues to thrive. All aspects of construction lead to a huge volume of dust. Many people want to know how to clean a new construction home.

One definite option is to hire a dedicated professional cleaning service. This will be sure to get results. If you want to take this route do your research. Read reviews of the company. Ask around. Settle on a firm you are confident will deliver.

For many people, though, the process of building a new home is so expensive that any saving is valuable so read on and discover how to do it yourself!

First, assemble these essential cleaning supplies. Be prepared.

Vacuum cleaner and attachments

Vacuum bags

Dust mask

Rubber glover

Paper Towels

Feather Duster

Dustpan and Brush

Bucket

Soap

Spongge

Rags

Rubbing Alcohol

Cleaning solution

Starting Out

Get all your supplies and take them to the garage. Being prepared is a large part of the battle won. Once you have everything in place, it’s time to systematically attack the whole house and restore order. Follow these basic steps, take your time and do the job thoroughly. Do not rush things and follow the steps in order.

How To Prevent Water Wastage In Clogged Toilets

How to Clear a Clogged Toilet With a Toilet Auger

To unclog a toilet, start with your easiest, least expensive options first.

First, try an accordion style toilet plunger.

  1. Accordion-style toilet plungers
  2. Look for a high-efficiency plunger that’s designed just for toilets, with a narrower, extended flange (that is, a round, lip-shaped reducer) at the bottom of the plunger to seal against the drain opening at the bottom of the toilet bowl.
  3. Before you begin, you may need to use a bucket to partially drain the toilet if the water level is close to the rim.
  4. Check to make sure the bottom of the plunger seals tightly against the opening at the bottom of the bowl.
  5. Use extra caution and wear fluid resistant gloves and eye protection when working on any plumbing fixture where chemical drain cleaners may have been used.

How to unclog a toilet with an auger

  1. Hold the handle grip with one hand and the crank with the other. Pull the crank up off the top of the handle until the cable as far up as it will go. The auger head “spring” at the end of the cable should be pressed up against the bottom of the handle.
  2. Lower the bowl guard or “bend” at the bottom of the handle into the toilet bowl. Gently insert it into the mouth of the drain, pointing in the same direction as the drain.
  3. Push the crank back down toward the top of the handle, until it comes to a stop or resistance.
  4. When you feel a stop or resistance, begin turning the crank in a circular clockwise motion as you continue to press down. Turn until the crank is sitting back on top of the handle—that means the cable is all the way through the length of the toilet pipe.
  5. If the cable gets stuck on the way down, try pulling up and cranking and then pushing down and cranking a few times. Don’t try to force the cable down or you could damage your toilet.
  6. Pull the crank back up straight off the handle to pull up any clogs or objects. If it gets stuck on the way up, crank the handle (still in a clockwise motion) as you pull up.
  7. You may need to try this a few times to dislodge the clog. You’ll know you’ve succeeded when the water in the toilet bowl goes down.
  8. When you think you’ve removed the clog, pull up the crank completely and remove the auger from the toilet. Try flushing (be ready to stop the flapper in the tank if the bowl fills up too much).
  9. Flush a few more times. If your toilet flushes normally each time, your clog has been successfully removed!

Before you put away your auger, make sure you wipe it down and remove any blockage debris from cable and the auger head “spring” at the end.

What to Do if the Plunger Doesn’t Work?

When a plunger is not enough to clear a clogged toilet, the next option is a toilet auger, (sometimes called a closet auger, named for an old term for toilet, the water closet). Like a standard drain snake, the toilet auger has a cable that rotates by a handle, but this tool is specially designed for toilets, with a hollow tube attached to an elbow fitting covered by a rubber sleeve that protects the toilet bowl from scratches.

It is certainly possible to clear a toilet clog with an ordinary drain snake, but all too often you will leave disfiguring scratches in the bottom of the bowl. A drain auger, on the other hand, will not scratch the porcelain of your toilet.

The flexible cable in a toilet auger is fed through the toilet drain using a hand crank, and the sturdy head of the cable is designed to dislodge tough clogs. This tool is not suitable for any other type of work, but considering that toilet clogs are by far the most common plumbing problem you will encounter, it is a tool worth owning.

Tips To Use A Toilet Auger

Clogged toilets are a nightmare, whether you’re dealing with a composting toilet or a regular water closet. It’s an eyesore, an embarrassment, and a potential health hazard. And it quickly escalates from a nasty smell to a toxic mess. Unfortunately, emergency plumbers are expensive!

Find The Source Of The Clog

There are two types of toilet clogs. The most common kind is restricted to the flushing toilet itself. It may be caused by toilet paper, or by an inappropriate item that fell (or was dropped) into the toilet. Kids’ toys, beauty products, and dirty washing water are common culprits. The second kind of clog happens in the sewer. For that type of blockage, you’ll have to call a professional plumber. You’ll know your sewer is blocked if there’s dirty water filling your sinks and tubs in addition to your toilet. If you have multiple clogs, you know it’s not just the toilet.

Remove Any Visible Debris

This doesn’t sound like fun at all, but it’s an essential step that many tutorials avoid. Wearing heavy-duty gloves, remove any messy matter and dump it in a bucket for disposal. Once this is done, pour a bucket of hot water into the toilet to see if it’ll dislodge any more dirt.

The reason you’re using a bucket instead of flushing the toilet is control. If you just flush it normally, the murky toilet water could flood your bathroom. With a bucket, you can pour a little at a time, observing the water level and preventing unhealthy spills.

Insert The Toilet Auger Or Plumbing Snake

This tool looks a little like a regular drain auger, but it has two protective casings made of rubber or plastic. Toilet augers have a ‘rubber elbow’ near the tip, and a hollow plastic or rubber tube in the middle. A coiled cable runs through the hollow tube casing, ending in a coiled hook.

It’s about 3 feet long when it’s fully stretched out, and has a spinning crank with a rotating handle. Place your auger into the toilet, pushing it in until the rubber elbow is nestled in the crook of your toilet. The rubber stops the wire from cracking your toilet surface.

That’s important, because cracks can cause leaks, and can eventually collapse the entire toilet bowl. They also form crevices where bacteria and toxic germs can hide. Once they’re in those gaps, it can be hard to get them out or clean the toilet properly, and this could lead to infections.

Plunger Alternative: Start With Dish Soap

As soon as the toilet clogs, learn how to unclog a toilet without a plunger and head to the kitchen and fetch some dish soap; the slippery soap should help lubricate the clogged pipe and allow the lodged debris slide down more easily. Pour about a half-cup into the toilet. If you haven’t got any dish soap on hand, chop a bar of soap into small chunks and drop the pieces into the toilet

Add Hot Water

If dish soap alone doesn’t do the trick for how to unclog a toilet without a plunger, adding water might move things along. Fill a bucket with hot bath water (boiling water could cause a porcelain toilet to crack), and pour the water into  the toilet from waist level. The force of the water could dislodge whatever is causing the clog.

DIY a Drain Snake Using a Wire Hanger

A more severe blockage could require manually moving the item. To do this without a plunger, unravel a wire coat hanger until it’s straight. Push one end of the wire into the clogged area. Prod the debris until it becomes free and flows down the drain. Voila! Another way to unclog a toilet without a plunger.

Tips For Flat Roof Repair

Tip: Roofing Contractors

Having to replace or repair your roof can be an overwhelming prospect. It’s one of the biggest projects you may have to consider for your home and can be expensive and time consuming.

Here are six additional tips for hiring a roofer:

Make sure you understand the full scope of the project. What exactly is the roofer going to do? Will they be doing spot repairs or replacing the whole roof? Will they be removing the old roof or covering it with the new roof? Make sure you understand the pros and cons of the solutions and that everything is detailed in your contract.

Ask about clean-up and waste removal. Confirm that your contractor will be responsible for taking away all old materials and cleaning up your site after their work is complete.

Consider your gutters and landscaping. A roof job will require the use of ladders that can cause damage when leaned against your gutters or stuck in your landscaping. How will your roofer protect against damage or fix things after the job is done?

Plan for bad weather. What happens if there is bad weather while your roof project is underway? Ask your roofer about what they will do to protect your home in the case of rain or snow.

Check your insurance coverage. If your project is for fixing damage, check your homeowner’s insurance to see if your project is covered and how you should proceed if it is. (You also want to check your contractor’s insurance coverage for things like worker’s compensation, property damage, and personal liability.)

Different contractors for different roofing systems. Roofing contractors may be certified to install specific types of roofs. You can check with the manufacturer to see if your contractor is certified for their system.

Clearly written proposals that are detailed and broken down into separate line items are a good sign that the contractor is being thorough and has prepared an accurate estimate.

The following is a partial list of items your estimate or proposal should include:

The type of roof covering, manufacturer and color

Materials to be included in the work, e.g., underlayment, ice dam protection membrane

Scope of work to be done:

Removal or replacement of existing roof

Flashing work, e.g., existing flashings to be replaced or re-used, adding new flashing, flashing metal type

Ventilation work, e.g., adding new vents

Who is responsible for repairing/replacing exterior landscape or interior finishes that are damaged during the course of the work? Make sure that it contains language addressing who is responsible for any damage that occurs as a result of the work.

All items of concern and work to be done should be included in the contract.

Installation method

Approximate starting and completion dates

Payment procedures

Length of warranty and what is covered, e.g., workmanship, water leakage

Who will haul away the old roofing materials and/or project waste (e.g. extra materials, packaging, etc.)? Is there extra charge for this service?

There are also ways you can extend the life of your roof:

Clear dead or overhanging branches. Have a professional tree service evaluate the branches hanging over your roof and decide whether or not they are a risk. If the branches are dead, that increases the chance of them falling onto your roof. In addition, heavily shaded areas of your roof can retain moisture, which sometimes leads to mold. Regular trimmings of overhanging branches will help your roof dry in a uniform manner.

Inspect for hail damage. After strong storms, especially hailstorms, have a licensed insurance adjuster or contractor inspect your roof. Dimples and cracks on the shingles are key indicators that hail damage has occurred.

Keep your eyes and ears open and remove debris. Homeowners should inspect their roof regularly and monitor for hail damage. Ground-level inspections can be done by the homeowner. You should also keep your gutters clear. If there’s debris that needs to be removed, either call a professional or be very cautious when getting up on your roof.

Finding the right roofing contractor can be tough.

As the highest part of a house, a roof protects anything that’s beneath it – your family and personal investments. Your roof also plays a huge role in keeping water out and making sure that you live comfortably. However, because people don’t see their roof every day, they rarely follow measures to maintain its good condition. This is why most roofs deteriorate and never reach their maximum lifespan.

If you require a roof repair or replacement, you need to find the best roofing services in your area. You should not only look for a roofing company that’s affordable, you want to make sure that the contractor can satisfy your exact needs. Any repair, big or small, will be able to help you enjoy a longer lasting roof for your home if done correctly.

Things Before Hiring a Roofing Contractor

Local physical office

Does your prospective roofing contractor have an office in your location? A contractor that doesn’t have an office you can conveniently visit is a major cause for concern.

Multiple quotations

When it comes to getting a roofing job, Angie’s List recommends that you get at least three bids from multiple contractors. Too often, homeowners are in a hurry to get a quick repair only to be frustrated later on because they’ve been over charged

Previous work samples or references

You will be able to get a good picture of how well a roofing contractor completes a roofing task by asking for samples and references. When it comes to samples, let a contractor show you pictures of their finished work. Most contractors include their portfolios on their websites so look for these.

Roof Repair

What is the Best Shingle Brand?

We receive this question a lot and it’s a hard question to answer. Some roofing companies only offer one brand of shingle which means they’ll default to the brand they know and trust. Other roofers offer multiple brands with the knowledge that the different brands

Perhaps the most frequently asked question we get is whether a roof repair can wait. The answer is always no. When you think (or know) you have a roof leak, ignoring it will only make the repair more costly. Here are some of the other frequently asked questions we’re

Step Spring Roof Check

Since most of us have a little more time at home these days, we wanted to challenge every homeowner to perform a spring roof check. It will only take a few minutes and it’s a great habit to start doing, not just every spring, but at least twice a year and after every

Ideas for your Home Maintenance in 2020

In our last blog, we shared some ideas about home maintenance that you should do about once a year (if you missed it, click here). In today’s blog we’re going to cover things that should happen twice a year or more often. Some you can do, others you may want to

Some maintenance you should do seasonally or a few times a year, other things just need occasional maintenance. If you’re unsure about what you should be doing to your home regularly in the way of maintenance, we’ve put together a list organized by what you should do.

THINKING ABOUT ROOF REPAIR? THINGS YOUR CONTRACTOR SHOULD HAVE

Dealing with a damaged roof can be incredibly frustrating, especially if you are worried about things like incoming water and mold growth. Fortunately, roofing contractors can restore form and function to the area but only if you choose the right team of professionals. If you are in the market for a roofing contractor, remember these five things they should have

Proper Licensing

If you live in one of the 21 states that require a roofer to have a license, make sure to look up potential contractor’s credentials before you break ground on any work. These guidelines are designed to protect homeowners from improperly executed jobs, and some states won’t even grant building permits unless contractors are properly licensed.

Up-To-Date Insurance Policies

Roofing is one of those construction jobs that is inherently dangerous. In addition to being confronted with steep roof pitches, obstacles and potentially unfavorable weather conditions, roofers also face lifting heavy boxes and working with hot tar.

Positive Reviews

A great recommendation can give you a great deal of peace of mind, so talk with family members and friends about people they have worked with in the past. Additionally, check online to see if the roofer you are considering has recent recommendations from people in your area.

Social Skills

Being able to communicate effectively with your roofing company will save you a tremendous amount of hassle in the long run, so pay attention during your initial interactions. As you screen potential contractors, take notes regarding how fast it takes for them to get back to you, how kind they seem and whether or not they seem genuinely interested in doing a great job

Things You Need To Know About Hiring A Roofing Contractor

Having a quality roof installation or replacement is a good investment for your home. But since no two residential roofing companies are created equal, you need to take your time to learn a few things about hiring a roofing contractor. Carefully researching prospective contractors will help you make a better choice in the hiring process. But why hire a roofing contractor instead of attempting a roofing repair on your own? In this guide, we explain why it’s important to hire a professional roofing contractor who knows their trade.

Saving Costs

Some homeowners have attempted DIY roofing repairs, but in the end, they made costly mistakes and had to hire someone to make it right. Hiring a professional roofing contractor to install, repair, or replace your roof is always a cost-effective approach. Moreover, an experienced roofing contractor has built long-term relationships with local suppliers, which enables them to access roofing materials at lower prices. They have the right tools and equipment to execute the work faster and more efficiently. If you take into account the materials and tools you’ll need to carry out a DIY roofing project, you’ll realize how much you could save by hiring a roofing contractor.

Saves Time

A professional roofer can do the work faster and free you up to attend to other priorities. Professional roofers work on timelines and are able to complete the task as fast as possible and move on to the next assignment. Experience counts a lot in the roofing profession, and when you hire a roofing contractor, you can bet they’ve worked for a while in the industry. They understand different types of roofs and the best approach to take in order to save time and costs. Additionally, their artistry is usually excellent, which ensures your roof stays for several years before it requires any repairs.

Guarantees Safety

Professional roofing companies have the equipment to work safely on your roof, so you don’t have to put your life in danger. As much as you may love DIYs, you can’t deny that roof installation, repairs, or replacement can be risky projects. Accidents could easily occur and put you in serious pain and costly medical expenses. By hiring a professional roofer, you can avoid risking your life and let the experts do what they know best. Moreover, they often insure their roofers to safeguard them and homeowners from liability.

Expertise

So, what does a roofing contractor do that you can’t do on your own? A professional roofing contractor specializes in this trade, so they can deliver high-quality work, identify hidden damages, and make the necessary repairs. An experienced contractor is well-versed with various roofing technologies and can guarantee excellent results while committing little to no mistakes in the process. They also utilize the right techniques, high-quality products, and highly-sophisticated tools and equipment.